The Honeywell TH6220D1028 is a FocusPRO 6000 Series programmable thermostat designed for residential HVAC systems. It offers a large, easy‑to‑read display, four daily schedules, and override features, enabling precise temperature control and energy savings.
Supports Wi‑Fi and mobile app control for access now.
Pre-Installation Checklist
- Verify HVAC system compatibility (gas, electric, heat‑pump).
- Confirm thermostat wiring type (4‑wire, 5‑wire, or 3‑wire).
- Check for existing thermostat wiring and label terminals.
- Ensure power is off at the breaker before starting.
- Gather tools: screwdriver, voltage tester, level, and mounting plate.
- Measure wall space to confirm mounting plate fits.
- Inspect for moisture or electrical hazards near the installation area.
- Read manufacturer’s safety instructions and local code requirements.
- Verify the thermostat’s firmware version for compatibility.
- Prepare a backup of current thermostat settings if possible.
- Confirm the thermostat’s battery type and capacity for backup power.
- Plan for future Wi‑Fi or mobile connectivity setup;
- Check for any required permits or inspections in your jurisdiction.
- Review the installation manual for any model‑specific notes.
- Set aside a clean, dry workspace for the mounting plate and wiring.
- Verify the thermostat’s communication port compatibility with your HVAC controller.
- Confirm the presence of a neutral wire if required by the system.
- Check the thermostat’s mounting orientation to avoid glare on the display.
- Ensure the thermostat’s firmware is updated to the latest version before installation.
All items should be checked before proceeding. If any item is missing, consult a qualified HVAC technician.

Keep the installation area free of dust and debris to ensure a clean and safe environment.
Wallplate Installation
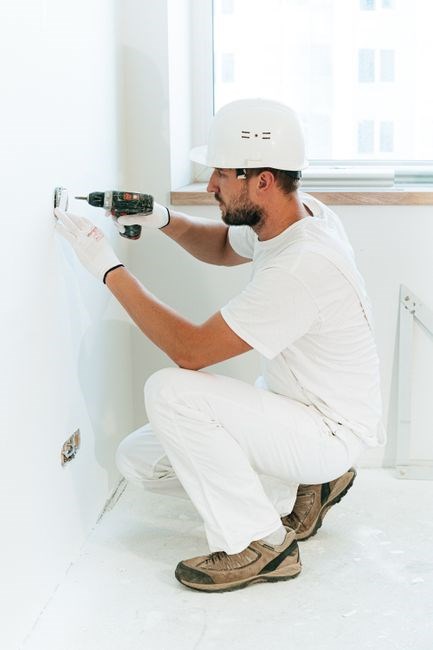
Remove the existing thermostat and disconnect all wires. With a spirit level, mark the desired mounting height—usually 48 inches from the floor—on the future plate location. Drill pilot holes for the mounting screws, then insert the wallplate screws and secure the plate. Align the plate with the level line, making sure the top edge is even and the back is fully seated. Slide the TH6220D1028 onto the plate, aligning the display so it faces the user. Tighten the mounting screws until the unit is firmly seated. Connect the thermostat wires to the corresponding terminals, following the color‑coded diagram. Double‑check each connection for tightness and correct placement. Restore power, then test the thermostat by adjusting the setpoint; the display should respond immediately. If the thermostat shows a fault, consult the troubleshooting section. After power is restored, press the power button to verify the thermostat boots. Observe the display for any error codes. If the thermostat shows a fault, consult the troubleshooting section. Finally, set a test schedule to confirm the thermostat’s response to heating and cooling cycles. Check wiring daily. Keep firmware updated battery replaced every 2 years.!!

Wiring
Connect the thermostat to the HVAC system using the color‑coded wiring diagram. Wire R to the thermostat’s R terminal, C to C, Y to Y, G to G, and W to W. Ensure all connections are tight and insulated. Verify polarity with a multimeter before powering the system. Always disconnect power before wiring. OK
Wiring Diagrams and Notes
The TH6220D1028 uses a standard 5‑wire configuration. Connect the power (R) to the thermostat’s R terminal, the common (C) to C, the cooling (Y) to Y, the heating (W) to W, and the fan (G) to G. If your system has a 24‑V transformer, wire the transformer’s secondary to the C and R terminals. For systems lacking a C wire, the thermostat’s built‑in capacitor can be used, but performance may be reduced.
Note that some older furnaces may require a 3‑wire setup. In that case, the thermostat can be wired in “3‑wire mode” by connecting the C wire to the transformer’s neutral and leaving the G terminal unused. Refer to the furnace’s manual for compatibility. Always follow local electrical codes and, if uncertain, consult a licensed HVAC technician.
Before connecting the thermostat, check the HVAC system’s transformer rating. A 24‑V transformer is typical; if your system uses 12 V, the thermostat’s built‑in capacitor may not provide sufficient power, leading to intermittent operation. Use a multimeter to confirm the voltage between R and C terminals after power is restored. If the voltage is below 20 V, consider installing a dedicated 24‑V transformer or a separate C‑wire. When wiring the G terminal, ensure it is connected to the fan contact on the furnace or air‑handler. Improper fan wiring can cause the thermostat to misinterpret fan status, resulting in incorrect cycling. Finally, after all connections are secure, power the system and observe the thermostat’s LED indicator: a steady green light indicates normal operation, while a flashing red light signals a wiring fault.
Check wiring before ok.
Power Options and Mounting
The TH6220D1028 operates on a 24‑V AC supply, standard for HVAC. Connect R and C to the transformer’s secondary. If no C wire, use the built‑in capacitor, though fan reliability may drop. It features a large, backlit display and Wi‑Fi connectivity for remote control via the FocusPRO app. and.OK!
Use a 24‑V transformer or a 1‑A adapter if the furnace supplies only 12‑V. The adapter must be wired to R and C. Ground the adapter to the system’s grounding point. Ensure the adapter’s power rating is at least 1 A and verify polarity before connecting to prevent damage.
Mount the thermostat at eye level, 48 inches from the floor. Use the supplied bracket and screws. Keep 6 inches clearance around the unit for airflow and maintenance. Avoid placing the thermostat near sources or sunlight, as excess heat can affect sensor accuracy.
Set four daily schedules. Use the override button to temporarily change the temperature. The thermostat remembers the last set point when power is lost. You can also program holiday schedules and use the vacation mode to save energy during absences and.
Common issues include a flashing red LED (wiring fault) or no display (power loss). Check R and C connections; Clean the thermostat’s contacts with a dry cloth. If problems persist, replace the unit. If the thermostat fails to power on, verify the C wire is connected; a unit can cause issues. OK!
Refer to the TH6220D1028 user manual for detailed wiring diagrams, installer setup, and programming instructions. Keep the manual handy for future maintenance. Lists safety guidelines and troubleshooting tips for HVAC.!
Installer Setup (ISU) Procedure
To access the Installer Setup, press and hold the Up arrow and FAN buttons until the display changes. Use Up/Down to navigate, NEXT to confirm, and DONE to exit, saving settings.
In ISU, set type, fan mode, and relay. Adjust values with arrows, press DONE to apply now. Verify display updates before exiting.
Accessing and Configuring ISU
To enter the Installer Setup (ISU) on the TH6220D1028, simultaneously press and hold the Up arrow and FAN button for at least three seconds. The display will flash, indicating that the ISU menu is active.
For most residential installations, set the System Type to “Single‑Zone” or “Multi‑Zone” as appropriate.
The Fan Mode can be configured to “Auto”, “On”, or “Cycle”; “Auto” will allow the thermostat to control the fan based on temperature thresholds.
After adjusting each setting, press DONE to return to the main screen.
The thermostat will display a confirmation that the new configuration has been applied.
It is recommended to perform a quick test by turning the heating or cooling mode on and observing that the relay activates as expected.
Once the ISU configuration is verified, the thermostat is ready for normal operation and user programming.
Use the Clock option to input the current date and time, ensuring that the system’s time zone matches the local setting.
After setting the clock, press DONE to lock the time.
Finally, review the Display Brightness setting to adjust the backlight level for optimal visibility in the installation environment.
With all parameters configured, exit the ISU and the thermostat will return to the standard operational mode, ready for user programming and daily use.
All changes are saved automatically; no additional steps are required to apply the new configuration.
The ISU menu is intuitive.
Adjust setting quickly

Programming and User Settings
Program four daily schedules: press PROGRAM, select DAY 1–DAY 4, adjust temps with UP/DOWN, times with LEFT/RIGHT, then DONE to apply. Override OVERRIDE, press DONE now
Programming Modes and Overrides
The TH6220D1028 offers multiple programming modes for daily routines. Standard modes include Home, Away, Sleep, and Vacation. Home mode keeps user‑set temperatures during occupied periods. Away mode reduces heating or cooling to preset minimums, saving energy when the house is empty. Sleep mode lowers the temperature at night for better rest. Vacation mode locks the thermostat to a single temperature, preventing swings while the home is unoccupied.
Overrides enable temporary changes to the schedule. Press OVERRIDE to set a manual temperature. Use UP/DOWN to adjust, then press DONE. The override remains until the next scheduled change or until OVERRIDE is pressed again.
To activate Vacation mode, press the VACATION button, set the desired temperature, and confirm with DONE. The thermostat will lock the temperature and ignore other modes until VACATION is deactivated. This feature is ideal for long trips or when the property will be unoccupied for weeks. When in Vacation mode, the system maintains the set temperature regardless of outside weather changes. The system also logs the duration for reporting purposes.
All modes and overrides can be customized via the installer setup menu. The installer can set default temperatures for each mode, define override limits, and schedule automatic transitions between modes based on time or occupancy sensors.
Troubleshooting Common Issues
Check power, wiring, and thermostat settings. If display is blank, verify 24V supply. For erratic temperature, reset to factory defaults via installer menu. If system fails to respond, clear the memory by holding the OVERRIDE button for 10 s. Contact support if problems persist.
Maintenance, Cleaning, and Safety Tips
Regular upkeep of the TH6220D1028 ensures reliable operation and extends its lifespan. Begin by turning off the thermostat and disconnecting the power source before any work. Use a soft, lint‑free cloth to wipe the display and housing; avoid abrasive cleaners that could damage the screen. Inspect the thermostat’s mounting screws and replace any that are loose or corroded to maintain a secure fit.
Check the battery compartment (if applicable) every six months, replacing the battery with a fresh one to prevent power loss. For the 24‑V power supply, verify that the wiring connections are tight and free of corrosion; use a multimeter to confirm proper voltage. If the thermostat shows a “LOW POWER” indicator, replace the battery or check the external power source.
Clean the sensor area by gently brushing away dust with a soft brush. Excessive dust can lead to inaccurate temperature readings. Keep the thermostat away from direct sunlight, high humidity, or chemical exposure, as these conditions can degrade the electronic components.
Safety first: never attempt to repair internal circuitry without proper training. If the thermostat displays error codes or fails to respond, consult the user manual’s troubleshooting section or contact Honeywell support. Regularly update the firmware via the mobile app to benefit from performance improvements and bug fixes.
Maintain the thermostat’s firmware by checking for updates in the mobile app every few months to ensure performance now
Resources, Documentation, and Conclusion
For detailed reference, download the official PDF user guide from Honeywell’s support portal. The guide includes full wiring diagrams, installation diagrams, and troubleshooting tables. Additional resources are available on the Honeywell FocusPRO website, where firmware updates, FAQs, and community forums provide ongoing assistance.
Key documents:
- TH6220D1028 Installation Manual – PDF (≈ 1.2 MB)
- Firmware Update Package – ZIP (≈ 3 MB)
- Quick‑Start Guide – PDF (≈ 200 KB)
- Warranty Information – PDF (≈ 150 KB)
For support, contact Honeywell Technical Services via phone or live chat. The manufacturer’s hotline is 1‑800‑HONEYWELL (1‑800‑466‑6398). Email support at support@honeywell.com. Local distributors also provide installation assistance and after‑sales service.
The thermostat’s firmware can be updated via the companion mobile app, which also offers remote control and scheduling; Users should verify that the HVAC system’s relay is compatible with the thermostat’s 24‑V control voltage. If the system uses a 120‑V relay, a compatible adapter is required. Regular firmware checks keep the device secure against bugs and improve efficiency. and auto‑updates.?!